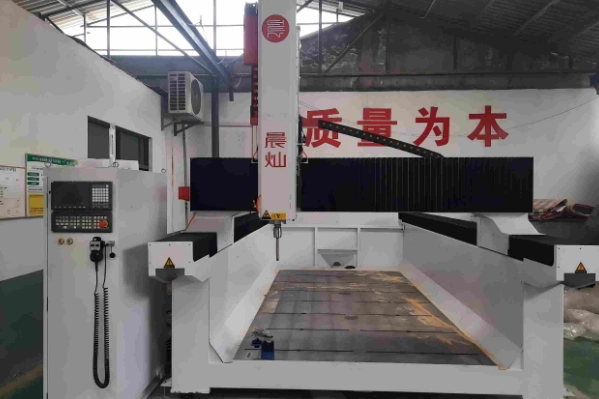
A mold trial becomes expensive when a factory has to remove too much material, spend long hours on roughing, and restart the job after design changes. A pellet 3D printer and CNC milling workflow helps solve that problem by printing a near-net-shape blank first, then machining only the surfaces that need tight accuracy or a better finish. For automotive models, casting patterns, thermoforming molds, marine plugs, and composite tooling, this approach can reduce waste, shorten iteration time, and make trial work easier to control.
Why Traditional Mold Trials Become Expensive
Most mold factories know the pain. A designer changes one radius, a customer wants a thicker wall, or the first trial part shows a weak corner. In a traditional subtractive process, the roughing burden comes first and the useful mold shape appears only after large amounts of material have already been removed. If the design changes late in the cycle, the factory may need to repeat that same roughing burden again.
Material Waste Is Only the First Cost
The real cost comes from the whole loop: material purchase, rough machining time, tool wear, fixture changes, operator hours, dust cleanup, surface repair, and the waiting time between trial rounds. That is exactly why a pellet 3D printer is becoming more attractive in development-stage mold work. It changes the starting point from cutting away everything unwanted to building a near-net-shape blank and machining only the surfaces that matter most.
Design Changes Can Move Faster
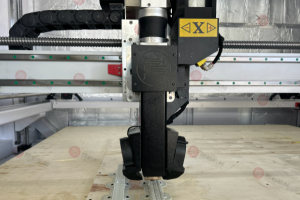
Trial molds are rarely perfect on the first round. A thermoforming mold, casting pattern, or vehicle model may need two or three design checks before approval. With a print-and-mill route, the team can revise the digital model, print a new blank, and re-machine the key areas without repeating a full subtractive cycle from a solid block. That is often where the biggest schedule savings appear, and it is one of the clearest reasons a pellet 3D printer adds value in mold trial work.
How the Print-and-Mill Workflow Works
The workflow is easy to explain. A digital model is printed with pellet material to create a near-net-shape mold blank. After that, CNC milling brings key surfaces to the required finish and accuracy. The process fits buyers who care about trial speed, material savings, and large plastic or composite mold development.
Step 1 Print the Near-Shape Mold Blank
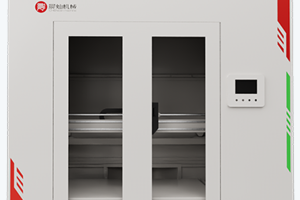
O DF1616 High Speed Automatic 3D Printer Machine for Mould Making is a DF 3D Printer Series model for industrial mold printing. Its stroke size is X 1600 mm, Y 1600 mm, and Z 1200 mm, with optional larger sizes for bigger tooling projects. For large mold and pattern work, the pellet 3D printer stage removes the heaviest roughing burden before machining begins.
The machine uses pellet raw material rather than filament. It works with thermoplastic materials such as PP, PE, PS, nylon, PVC, ABS, PA, PPS, and acrylic. For trial molds made from plastic or composite-related materials, a pellet 3D printer creates a more flexible starting point for repeated revisions while keeping large-format output practical. For many factories, the pellet 3D printer is the step that makes large-format iteration commercially realistic.
Step 2 Mill the Critical Surfaces
After printing, milling handles the surfaces that need tighter tolerance, smoother finish, or better assembly fit. The finishing stage can focus on sealing faces, edge lines, mating areas, contours, trimmed openings, and other functional zones. This is where the workflow becomes commercially useful: printing handles volume, and milling protects the final result.
CHENcan provides solutions across milling, ultrasonic machining, laser processing, welding, sanding, and additive manufacturing. For buyers, the point is simple: printing and milling should be planned together. If the printed blank has poor allowance planning, milling becomes harder. If the milling stage is ignored, the printed surface may not meet mold requirements. In a mature mold workflow, the pellet 3D printer and the finishing machine should be planned as one coordinated process rather than two isolated steps.
Why Pellet Printing Fits Mold Trials Well
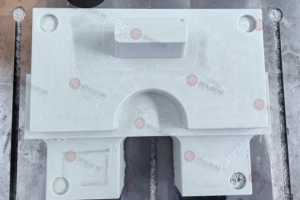
Pellet printing is not just large 3D printing. Its value comes from material form, output rate, heating ability, cost control, and suitability for repeated development work. For mold trial projects, these details decide whether the process is commercially useful or just a demo.
Faster Output With an 8 kg per Hour Extrusion System
The DF1616 lists a maximum extrusion volume of 8 kg per hour, a maximum heating temperature of 350°C, three heating sections, and nozzle diameters from 2 mm to 6 mm. Those points matter because trial tooling is usually judged by how quickly a workable blank can be created for machining, not by hobby-level print detail. A pellet 3D printer is useful here because it is designed around throughput.
Lower Waste With Recyclable Granular Materials
Granular printing materials can help reduce the financial pain of repeated trial rounds. A failed sample, a modified version, or a design test no longer feels like throwing away a full solid block. In many factories, that makes development-stage quoting and iteration easier to justify, especially when design changes are frequent.
Better Fit for Large Plastic and Composite Tooling
This workflow is strongest when the mold is large, the substrate is plastic or composite based, and the factory expects revisions before production release. It is especially relevant for automotive models, aviation patterns, wind blade tooling, foundry molds, marine molds, fiberglass trimming fixtures, and other large-format development work. In these applications, a pellet 3D printer fits the real scale of the job better than a small-format printing route.
Why Should Buyers Care About Supplier Experience?
Buying a mold 3D printer is different from buying a small workshop tool. The buyer needs process advice, material checks, proofing support, delivery planning, installation guidance, and long-term service. Without that support, a machine may arrive on time and still fail to produce a stable workflow in the customer factory.
Factory Strength Reduces Procurement Risk
CHENcan was founded in 1998 and has provided CNC products and services to customers across more than 70 countries and regions. The company has built long-term experience in mold processing, gantry machining, five-axis work, composite applications, and industrial additive manufacturing. For an overseas buyer, those details matter because the machine may influence quoting, delivery, and customer approval for years.
R&D Background Matters for New Mold Workflows
Buyers can also review CHENcan’s history and factory information before comparing suppliers. That background supports a more serious conversation than machine price alone and helps buyers judge whether the supplier can explain where the pellet 3D printer creates value and where CNC finishing still carries the critical accuracy burden.
How Should a Buyer Judge This Workflow Before Ordering?
A 3D printer and milling workflow is not right for every mold. It is strongest when the buyer needs faster trials, larger plastic or composite molds, reduced roughing waste, and more flexible design changes. Buyers should start with actual project data, not a general request for price, and judge whether the pellet 3D printer stage will genuinely reduce roughing hours, material waste, and trial delay on the target mold family. The right pellet 3D printer should be evaluated as part of the full mold-development process, not as a standalone machine purchase.
Check the Part, Material, and Finish First
Useful information includes:
– Maximum mold size
– Target material or pellet type
– Required surface finish after milling
– Wall thickness or shell planning
– Heat resistance needs
– Trial quantity and expected revision rounds
– Available workshop space
– Power supply and air pressure
– Dust and safety requirements
The DF1616 supports file formats such as STL, AMF, and 3DMF, plus Ethernet, USB, and Wi-Fi data transfer. It also uses a steel welding structure, optional drying support, and repeatability rated at ±0.15 mm/m on X, Y, and Z. Those specifications are useful, but the better buying decision still comes from matching the process to the real part.
Ask for Process Advice Before Price Negotiation
The best quotation should be based on the buyer’s drawing, material, target cycle, and finishing method. CHENcan’s solução pages can help buyers match equipment to application fields, while service support should be checked for installation, training, and after-sales response.
For direct project discussion, buyers can use the contact page and send drawings or sample photos first. A small reminder from real factory work: do not hide difficult parts during the first discussion. Deep pockets, thin walls, heat requirements, and heavy post-machining needs should be discussed early so the machine choice is more accurate and the mold trial cost is more honest.
FAQ
Q1: What is the main benefit of using a 3D printer and CNC milling workflow for mold making?
A: The main benefit is lower trial cost through less rough machining, lower material waste, and faster iteration when the design changes.
Q2: Is pellet 3D printing better than filament printing for large mold trials?
A: For many large mold and pattern applications, yes. Pellet printing usually offers better throughput and is more practical for producing large near-net-shape blanks.
Q3: Can this workflow replace CNC finishing completely?
A: No. CNC finishing is still important for surfaces that need accuracy, assembly fit, or a better final finish.
Q4: What materials can a mold-making pellet 3D printer typically process?
A: Common options include PP, PE, PS, nylon, PVC, ABS, PA, PPS, acrylic, and other thermoplastic pellet materials, depending on machine configuration.
Q5: What should a buyer send before asking for a quotation?
A: The most useful inputs are drawings, mold size, material preference, finish requirements, expected revision rounds, and workshop conditions.